Showing posts with label Funky Friday Feature. Show all posts

Funky Friday Feature: Southern Lovely

Hello Funky Polkadot Giraffe readers! I'm Lindsay, from Southern Lovely, and I am so honored to be guest blogging today on Kyla's fabulous blog!


I am a very busy mom of three young children--5 years, 3 years & 5 months. But whenever I get a free minute to myself, I love to create. It's really therapy to me. :)


If you check out my blog, you'll find some inexpensive ways to decorate your house. Here's one of my favorites--


DIY storage bins


We needed more storage in our baby boy's room, but had to be creative where to put it. Right under the crib became the perfect place for something, just had to figure out what to use. I looked at different bins to purchase, but they all seemed a bit much, especially when buying multiple ones. I figured I could surely make something less expensive, and I that's just what I did.


Started with three $1 buckets from the Dollar Tree


Spray painted them--you have to do multiple coats to get it just right. There is a spray paint for plastic, which I tried, I just didn't love the color (there's not much selection). I ended up using my favorite green--Valspar New Avocado.


Add some fabric--found mine at Walmart.

I started by gluing the outer brim of the bucket with the fabric, then worked my way in. It took a lot of glue & cutting to get it to look pretty good. I cut a circle piece for the center of the bucket, then glued it down. It helped to make everything look smooth & more complete.


Lastly, added the vinyl numbers to each bucket, because I just love labeling things. :)


I am really happy with how these little inexpensive buckets turned out!


And here are just a few others that you might enjoy--


Board & Batten


Thrift-store box


Lima bean wreath


Yellow dresser makeover


Thanks for having me Kyla! I hope some of your lovely readers will hop on over to my blog sometime!


Funky Friday Feature: The Gunny Sack

Hello Funky Polka Dot Giraffe readers! I am so excited to be this weeks Funky Friday Feature!! My name is Tonia and you can find me over at The Gunny Sack. I blog about crafting, sewing and cooking and hope you stop by for a visit! Today I am going to share with you how to make a painted leather flower.


Find 3 various sized circular objects to trace. I found a plastic cup, a thermos lid and a medicine cup. Trace the 3 circles onto a piece of leather.


Cut the circles out, making the edges wavy. I left the edges of the smallest one as a circle.


Paint the leather leaving a black border. I used teal acrylic paint but fabric paint and leather paint would also work.


This is how it looked after one coat of paint. Let the first coat dry and then add a second coat.


After the second coat dries, light a candle and put the edges near the flame. They will begin to curl up.


Using hot glue, put glue on the suede but only in the center. You don't want to completely flatten the flower layers together.


Glue a rhinestone into the center of the flower and it is done! You can now use the flower for whatever you want to embellish.


If you want to make a headband, cut a small strip of leather.


Hot glue the strip over the headband on the back of the flower.


You can also use larger rhinestones in the center of the flower for a variation.


Here are a few of the other tutorials you can find on The Gunny Sack.


Come stop by and say hello!


Thanks Kyla for having me as your guest today!

Funky Friday Feature: Sweet Peas & Bumblebees


Hi Funky PolkaDot Giraffe readers!

I am thrilled to be unveiling my latest project here at Funky PolkaDot Giraffe ! Her blog has the most amazing projects and I’m so excited to be sharing mine on her super creative blog!image


IMG_1923


First, a little bit about me…

I’m Alisa from the blog Sweet Peas & Bumblebees. My twin sister and I LOVE to blog about all things crafty and thoroughly enjoy spending our time creating new projects and trying new recipes! We even have a linky party on Wednesdays where you can show off your best recipes and latest craftiness! We totally love seeing everything you all come up with and would love if you would join us!


Now for my tutorial…

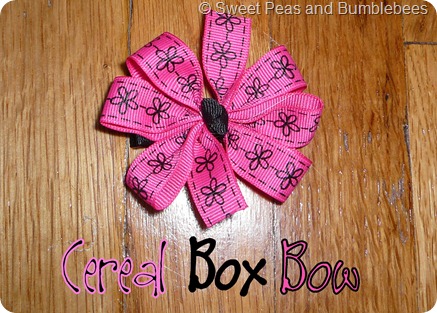
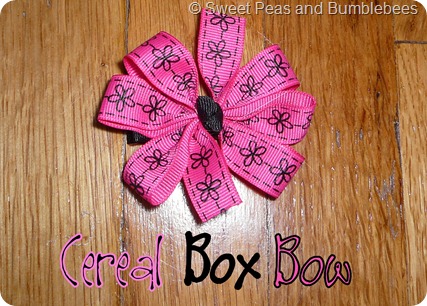
Cereal Box Bow
bows 041

Have you ever wanted to make bows, but don’t quite know where to start? This is the tutorial for you! It is SO easy….anyone can do it!


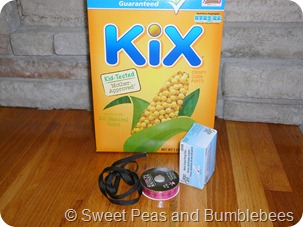
You’ll need:

bows 004


*Cereal Box
*Metal Single Prong Clips
*Ribbon {I chose 2 colors for my bow (the pink is 5/8” and the black is 3/8”)}

*Hot Glue
*Needle & Thread


Now, to get started…..


bows 006


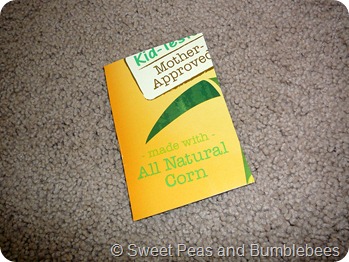
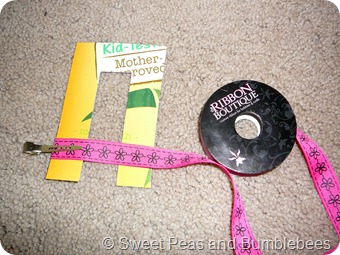
* You are going to start by cutting out your cereal box template.

* I wanted to make a 3” bow, so I cut my template 3” x 4.5”.

{{if you want to make a 2” bow, make the width of your template 2”….you can do this to make any size bow}}


bows 007

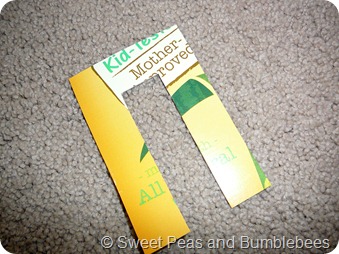
* Making it even on both sides, cut a 1 inch strip down the middle of your template.


bows 008

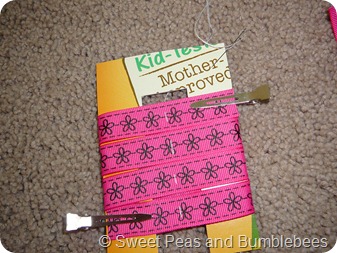
*Place your ribbon on the left side of the template and secure with a metal clip.


bows 010_edited-1


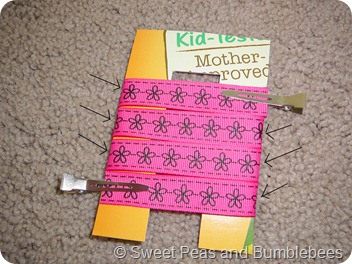
* Wrap your ribbon tightly around the template {making sure the template does not bend}.

* Cut the ribbon & secure with a clip on the other end.

* I made my bow a 3 loop bow, but you can do more or less….whatever you desire. Every time your ribbon bends around the template (where the arrows are pointing), that will be a loop.


bows 011

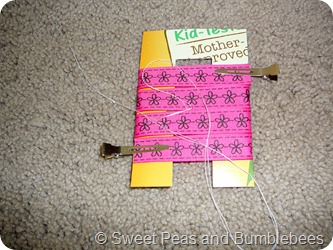
* Grab your needle & thread.

*Make your thread a double strand.

* Leave a tail behind your knot (make sure you knot your thread 3-4 times) {You will use the tail when tying off the bow}

bows 013


bows 018


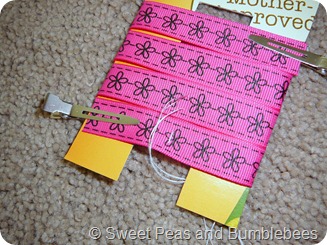
* Starting in the middle of the space you cut out, towards the bottom edge of the bottom row of ribbon, insert your needle from the back.

*Bring your needle up and back down through the top, towards the top edge of the bottom row of ribbon.

bows 019

*Continue this until you have gone up and down through all the rows of ribbon.

* DO NOT cut off your needle.

bows 021


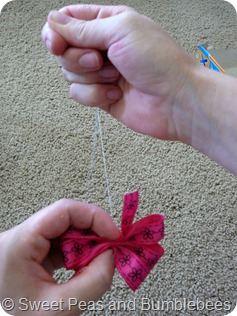
*Carefully slide your ribbon off of your template.


bows 025


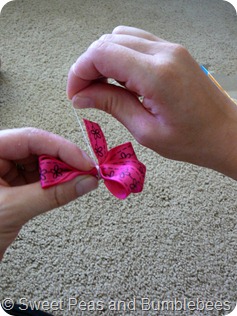
*Grab the ribbon with your left hand and firmly pull the thread with your right hand until it is as tight as it will go and your bow is scrunched up together.

*Hold the bow together with your left hand.


bows 026


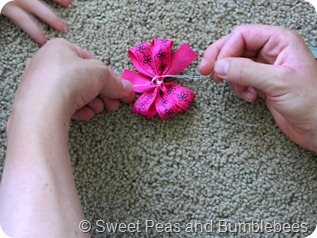
*Continue to hold the bow with your left hand, as you wrap your thread around the center of the bow 5 or 6 times, very tightly.


bows 029


*Use the tail of the thread you left & the rest of the thread with your needle on it to tightly tie several knots, securing your thread.

*Cut the thread closely to the knot.
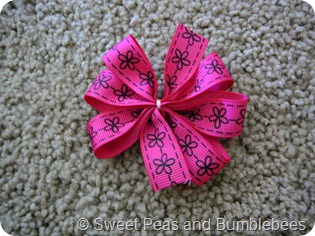
bows 032

*Use your hands to spread out the loops of the bow.


*Glue your bow onto a lined metal clip & complete with a center ribbon or knotted center ribbon (I did a knotted center ribbon)


That’s it…..you are done!! Pretty easy right?


You can pretty much do anything with this template! Just make a different template for different sized bows & use different sizes of ribbon as well! The possibilities are endless!


bows 041


Thanks for letting me share my tutorial here today!

Come visit us at Sweet Peas & Bumblebees to see some of our favorite posts:

Subway Art Flower Pot

image


image


Monster Play Date

image


Alisa_Signature